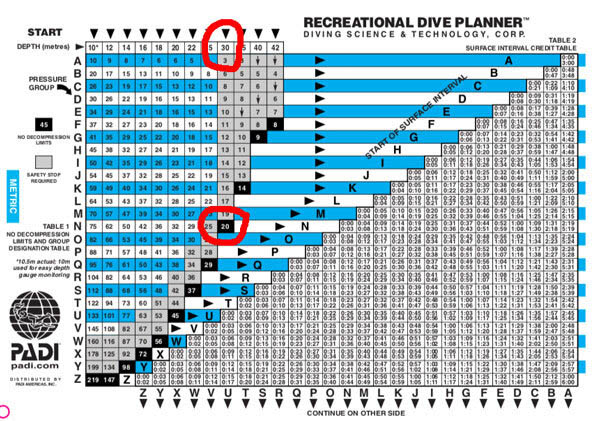
The PADI Wheel was this incredible feat of engineering that allowed us to extend our bottom time. I believe it came onto he market in and around the early 90’s when dive computers were still very expensive and a luxury to have. Yes, in those days, most of dived on tables and we had to plan our dives and remember what that plan was.
The revolutionary thing about the PADI wheel was that it allowed us to plan multilevel dives rather than just one dive to a certain depth. When planning a dive with the dive tables for instance to 30 meters, the tables give us a no decompression limit of 20 minutes. Meaning that we are allowed to stay at 30 meters for 20 minutes. The restriction of the RDP however was that it could not cope with the fact that we didn’t stay at 30 meters for 20 minutes. A dive profile might have been to 30 meters for 15 minutes and then we would ascend to 20 meters and remain there for some time and then ascend to 10 meters. The PADI recreational dive planner (RDP) could not account for the fact that we would be absorbing less nitrogen at 20 meters and at 10 and therefore allowing us to stay for longer. Nope!!!! The RDP assumed that we remained at 30 meters for the entire dive.
Can you imagine how excited we got when this new device came out that would allow us to plan dives so that we could do multilevel? It was the best thing since split fins…. (Split fins, that is another story for a different blog)
LET’S GET INTO HOW THE PADI WHEEL WORKS:
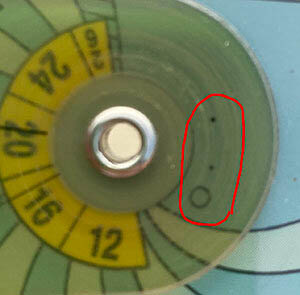
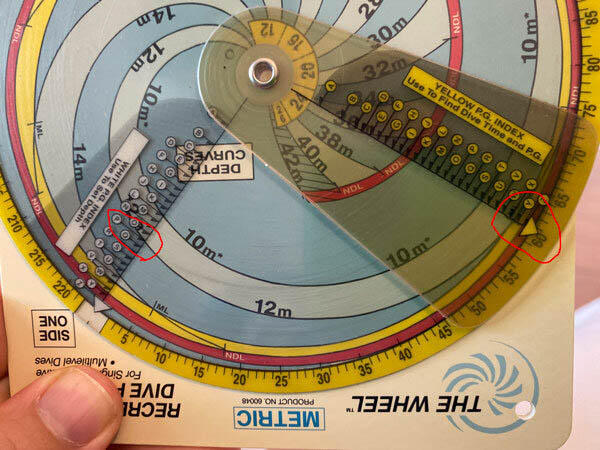
How did this marvel of technology work? For starters we had to make sure that the wheel was calibrated. See the dots and the small circle? You had to rotate the wheel and the arm to ensure that the dots would line up with the circle. If it did not then the PADI wheel was out of calibration.
Next we would set the wheel to our first dive depth. For this example we will plan a dive to 30 meters to start off with and then ascend to some shallower depths during the dive.
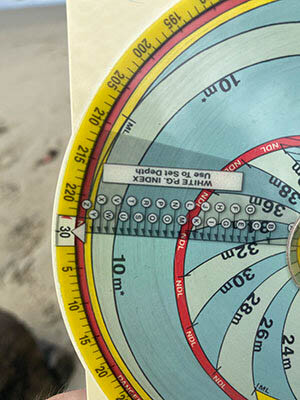
In order to set the first depth turn the main wheel so that it lines up with 30 meters in the window.
So good so far….
The next step is to find out what the no decompression limit is for a dive to 30 meters.
If you have a PADI RDP table version handy you can easily see that the NDL for 30 meters is 20 minutes.
On the PADI wheel, moving the yellow tab along the 30 meter curved line to where the red NDL area start you will see that the NDL for 30 meters is 20 minutes. This is exactly the same NDL as if you were working with the tables. Both are using the same algorithm to work our no decompression limits.
Now…. this is where the wheel comes into its element. Let us assume that you only spend 15 minted at 30 meters and then move onto a shallower depth.
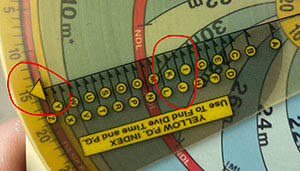
Moving the yellow tab along the bottom time indicators, set it to rest over 15 minutes. Looking at the 30meter curved line you will see that the letter “I” touches the 30 meter line, but the letter “J” pierces the line. The letter that pierces the 30 meter line is the pressure group that the diver would be if they had done a dive to 30 meters for 15 minutes.
Next we must see to what level or depth we can ascend to.
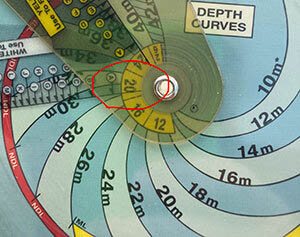
In order to do so look at the centre of the wheel and see where the 30 meter curved line originated from. You can see that the 30 meter curved line originates from a yellow box with a 20.
You can also see that the 28 meter curve originates from the same 20 meter yellow box. This means that the deepest next depth if your first depth was 30 or 28 meters must be no deeper than 20 meters. The next level can be less than 20 meters, but not deeper than 20 meters. Simple… right?
Let’s assume that our next depth is 20 meters. Remember from above that the pressure group after 15 minutes at 30 meter was pressure group “J” ?
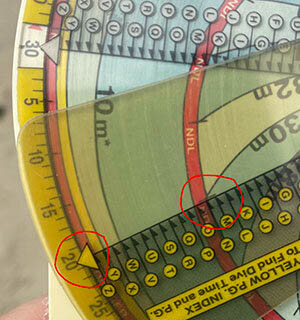
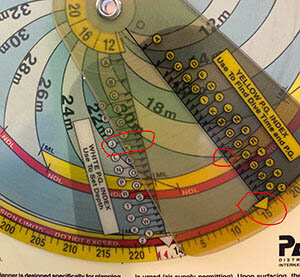
Now it is going to get really funky. Find the 20 meter curved line and rotate the white marker so that pressure group “J” touches the 20 meter line. Rotate the yellow indicator to find out the maximum allowable time or your (NDL – No decompression limit) to be spent at this depth.
Note the yellow ML shaded area above the red NDL shaded area. To find the Multi Level (ML) no decompression limit use the yellow line. From the image you can see that the maximum allowable time is 15 minutes.
Already the total allowable dive time is 30 minutes, when originally if diving on simple tables the maximum dive time for a dive to 30 meters would have restricted the diver to 20 minutes.
If I have not lost you yet and you are still with me let’s do another level….
Let’s assume that instead of spending 15 minutes at 20 meters we only spent 10 minutes there.
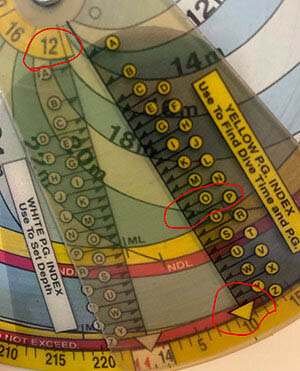
Looking on the 20 meter curved line you can see that the letter “O” touches the line but “P” pierces the line. This means that after 10 minutes the next pressure group the diver finds themselves in is pressure group “P”
Also note that the 20 meter curved line originated out of the yellow 12 meter box. This means that the next level can not be deeper than 12 meters.
Let’s plan the next depth to 12 meter and see how long you can stay there.
Just like in the above example where we moved from 30 meters to 20 meters, we must use the white pressure group indicator to line up with the new depth. This time remembering that the divers pressure group is “P” after spending 10 minutes at 20 meters. Aligning the white “P” with the 12 meter line and then moving the yellow indicator to the yellow multi level no decompression limit. Note that the diver can remain at 12 meters for a further 60 minutes.
If the divers air supply would last, the dive to 30 meters ascending to 20 meters after 15 minutes and then ascending to 12 meters after 10 minutes would allow you to remain at 12 meters for a further 60 minutes. A total of an hour and 25 minute dive. What made the PADI wheel so amazing was that a diver who didn’t have a dive computer and dived on the PADI RDP tables, the wheel extended the bottom time from 20 minutes for a 30 meter dive to one hour and 25 minutes.


